 typora配合PicGo图床设置
# topora图像设置
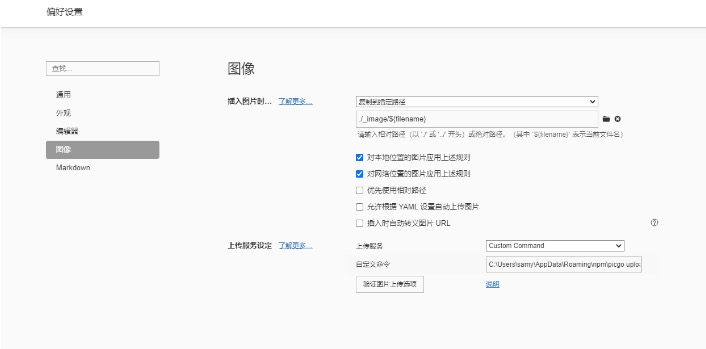
# 命令行上传
PicGo在2.1.0版本开始支持命令行调用PicGo客户端进行上传了。
上传的命令是 upload (用于上传剪贴板图片)以及 upload xxx.jpg 用于上传具体路径的图片。
# Windows
Windows可以通过 你安装的PicGo的路径\PicGo.exe upload 来调用上传。
# macOS
macOS可以通过 /Applications/PicGo.app/Contents/MacOS/PicGo upload 来调用上传。
# Linux
Linux可以通过 你安装的PicGo的路径/PicGo.AppImage upload 来调用上传。
# npm包命令行上传
C:\Users\samy\AppData\Roaing\npm\picgo upload
C:\Users\samy\AppData\Roaming\npm\node_modules\picgo
# 设置图床
# PicGo配置
PicGo的配置文件在不同系统里是不一样的。
- Windows:
%APPDATA%\picgo\data.json - Linux:
$XDG_CONFIG_HOME/picgo/data.jsonor~/.config/picgo/data.json - macOS:
~/Library/Application\ Support/picgo/data.json
举例,在windows里你可以在:
C:\Users\samy\AppData\Roaming\picgo\data.json找到它。【要点】
在linux里你可以在:
~/.config/picgo/data.json里找到它。
macOS同理。
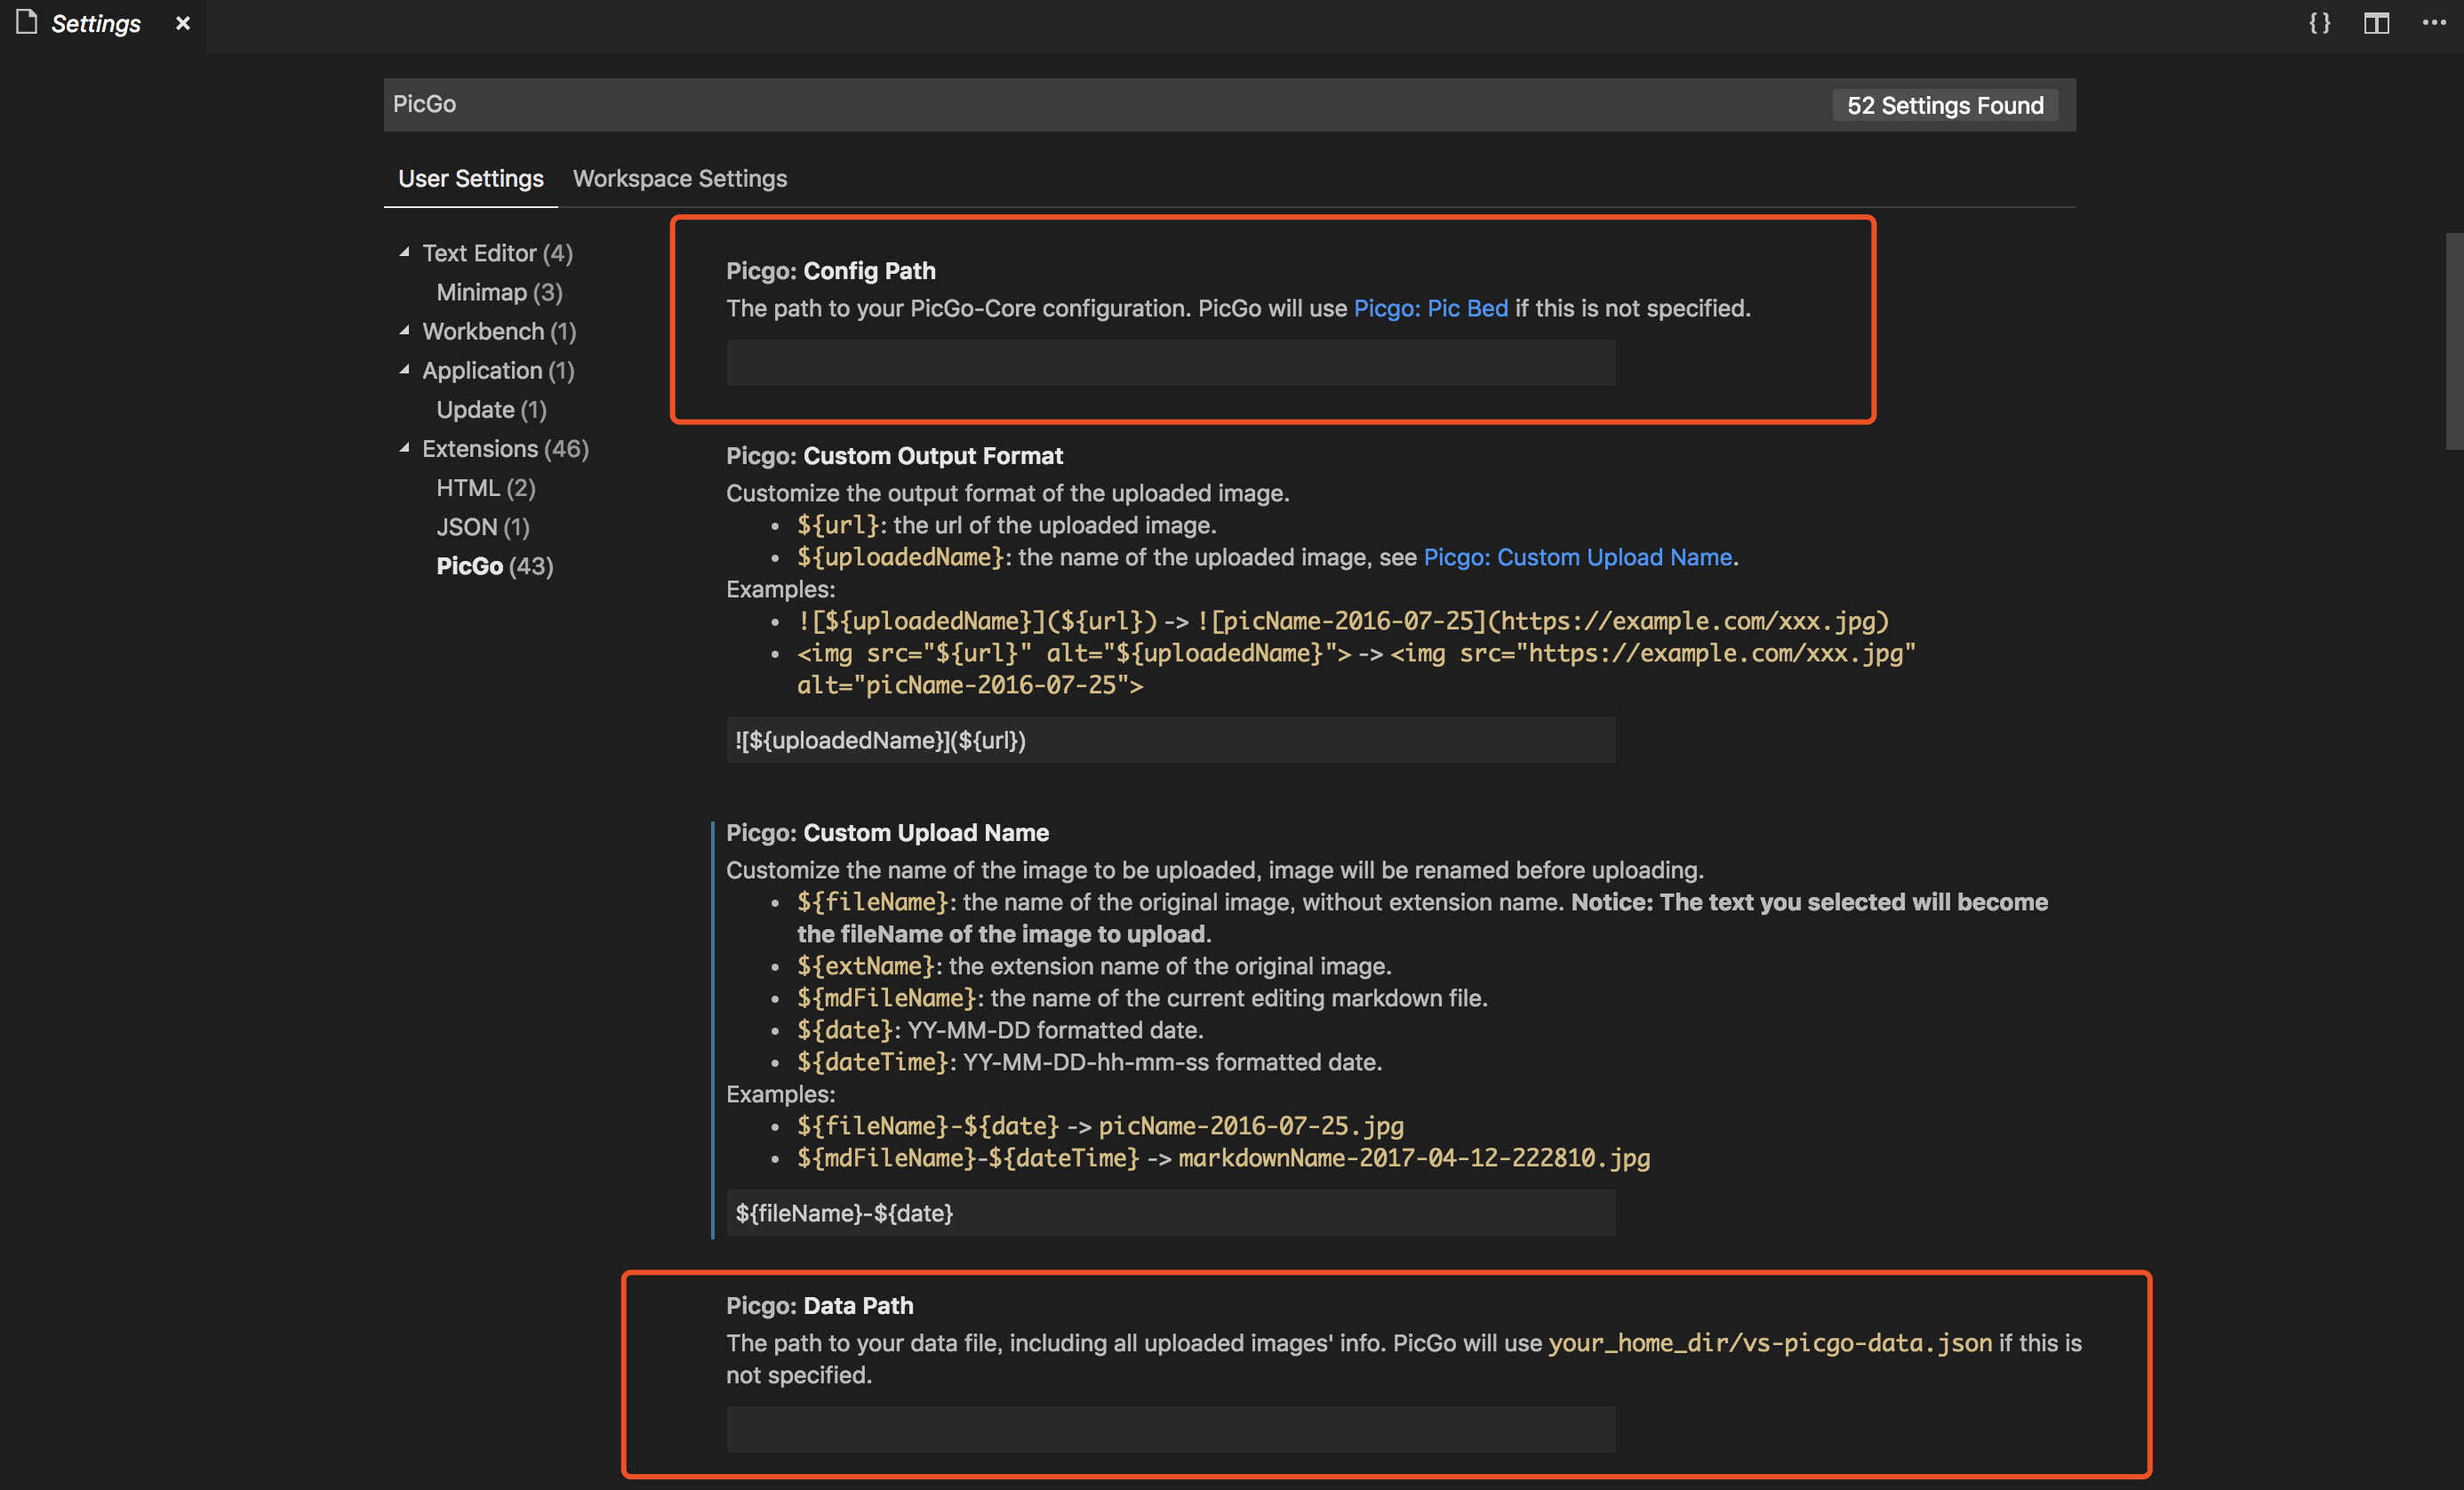
Notice: YOUR_HOME_DIR should be replaced by the path of your current user path.
// Windows
{
    "picgo.configPath":"YOUR_HOME_DIR\\AppData\\Roaming\\PicGo\\data.json",
    "picgo.dataPath": "YOUR_HOME_DIR\\AppData\\Roaming\\PicGo\\data.json"
}

// macOS
{
    "picgo.configPath": "YOUR_HOME_DIR/Library/Application Support/picgo/data.json",
    "picgo.dataPath": "YOUR_HOME_DIR/Library/Application Support/picgo/data.json"
}

// Linux
{
    "picgo.configPath": "YOUR_HOME_DIR/.config/picgo/data.json",
    "picgo.dataPath": "YOUR_HOME_DIR/.config/picgo/data.json"
}
2
3
4
5
6
7
8
9
10
11
12
13
14
15
16
17
In this way:
vs-picgowill use the same configuration asPicGo-electron.PicGo-electronwill display all the uploaded images byvs-picgoin its gallery.
# GitHub/jsDelivr【推荐】
推荐使用GitHub作为图床,特点是免费、稳定,有一个小缺点是国内访问速度慢,不过没关系,可以使用jsDelivr免费CDN加速。jsDelivr (opens new window)是国外的一家优秀的公共 CDN 服务提供商,该平台是首个「打通中国大陆与海外的免费CDN服务」,无须担心中国防火墙问题而影响使用;
步骤
新建GitHub仓库,注意仓库要设置成公开
参照 官方文档 (opens new window) 生成一个token密钥
在 这里 (opens new window) 下载PicGo,安装完成后打开,
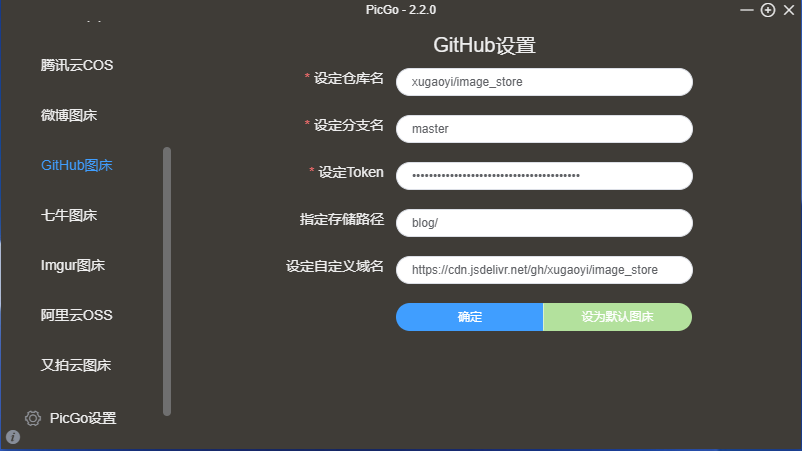
图床设置选GitHub图床,并填写相应的信息- 仓库名:前面新建的仓库,格式:
<用户名>/<仓库名> - 分支名:填写主分支
master即可 - Token:前面生成的token密钥
- 存储路径:按你自己的需求填写
- 自定义域名:图片上传后,PicGo 会按照
自定义域名+上传的图片名的方式生成访问链接,此处我们填写jsDelivr的CDN加速地址,格式:https://cdn.jsdelivr.net/gh/<用户名>/<仓库名>
- 仓库名:前面新建的仓库,格式:
使用https://tinypng.cn/压缩你要上传的图片(如图片已经很小或有更好的压缩工具可省略)
在PigGo的
上传区上传你的图片,到相册一键复制刚刚上传的图片URL;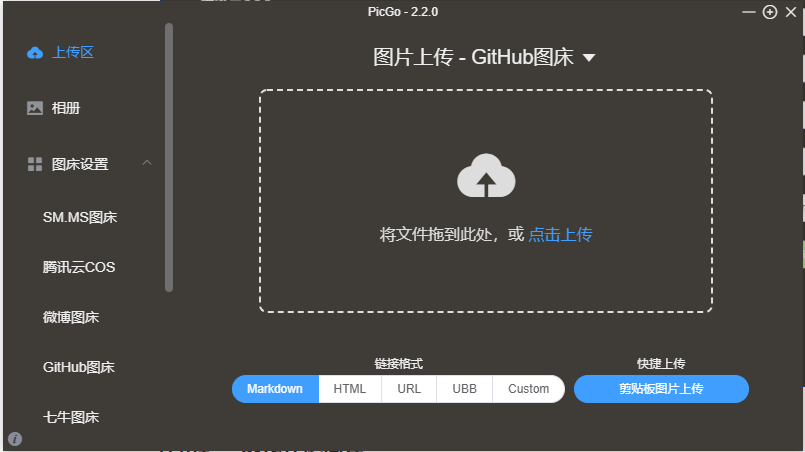
# 七牛
配置项及说明:
{
  "accessKey": "",
  "secretKey": "",
  "bucket": "", // 存储空间名
  "url": "", // 自定义域名
  "area": "z0" | "z1" | "z2" | "na0" | "as0", // 存储区域编号
  "options": "", // 网址后缀,比如?imgslim
  "path": "" // 自定义存储路径,比如img/
}
2
3
4
5
6
7
8
9
  "picBed": {
    "current": "aliyun",
    "aliyun": {
      "accessKeyId": "xxx",
      "accessKeySecret": "xxx",
      "area": "oss-cn-shenzhen",
      "bucket": "samyzxx",
      "customUrl": "",
      "path": "note/"
    }
  }
2
3
4
5
6
7
8
9
10
11
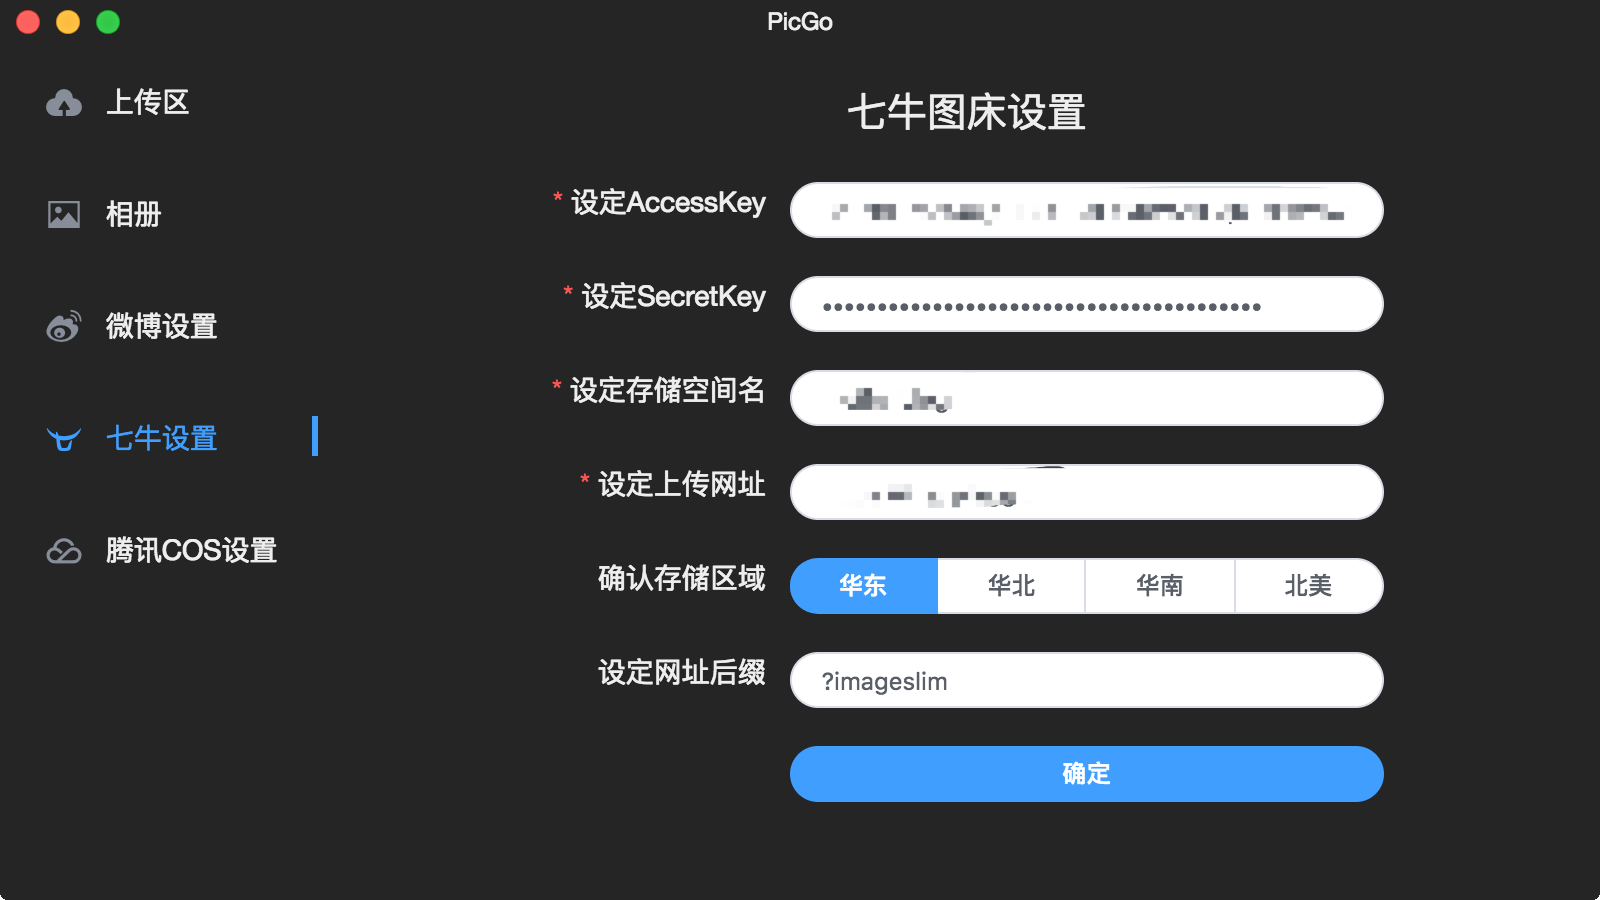
对应的密钥信息需要到七牛自己的控制台 (opens new window)里找到。其中需要注意的是,自己的存储空间的区域需要确定:
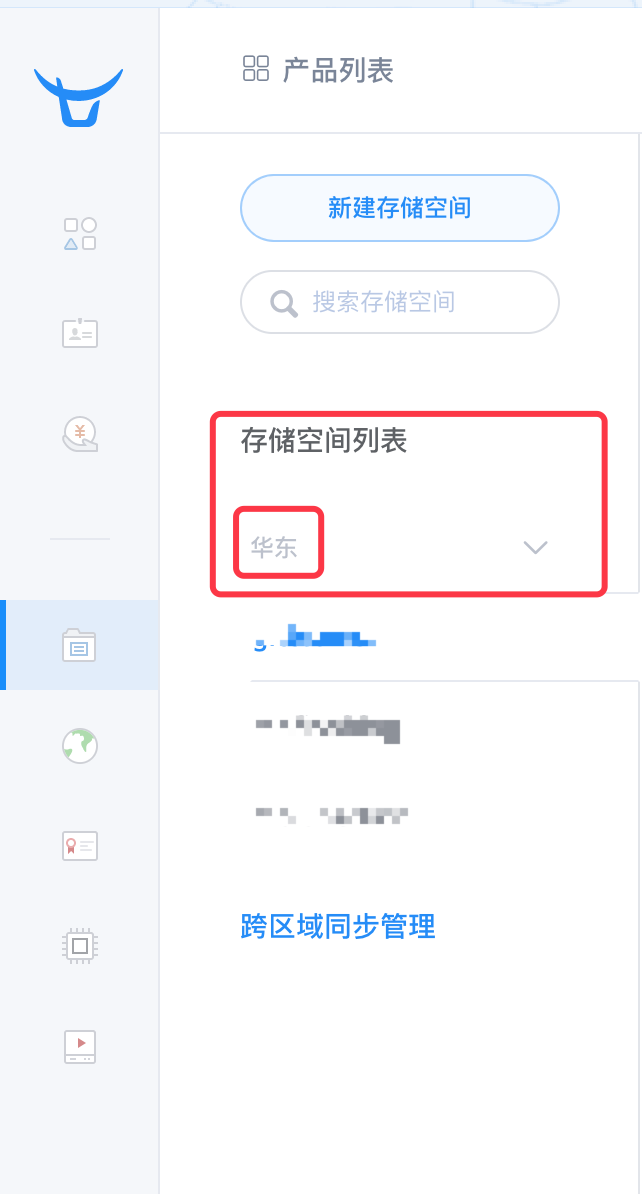
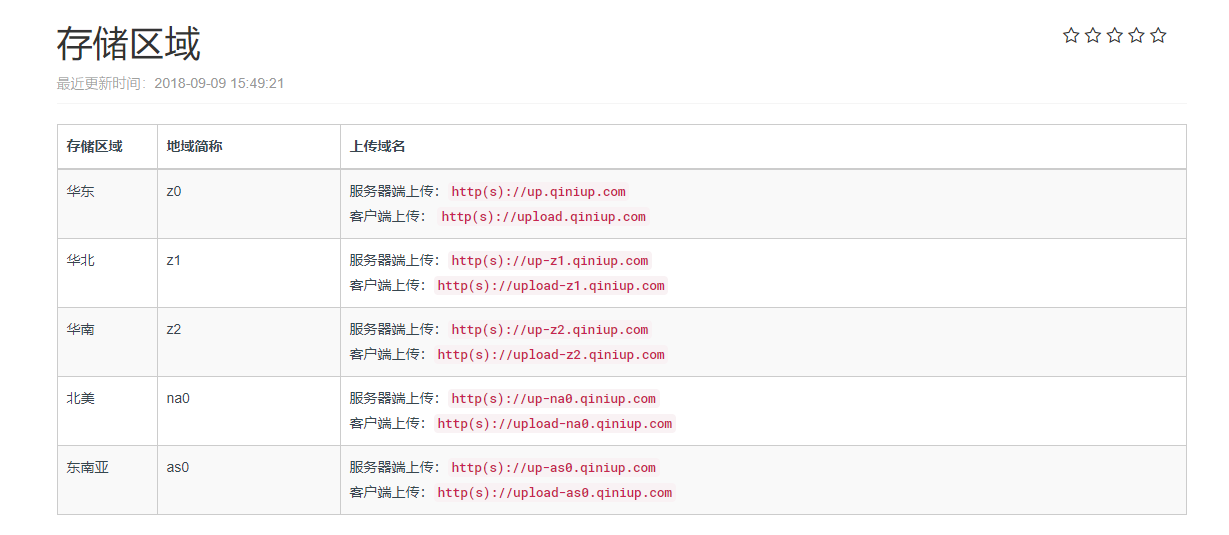
在配置文件里,存储区域对应的键是area,值是下图所示(如果你是用PicGo-Core或者其他非electron版本的PicGo请注意此项),比如华东的话就是z0。
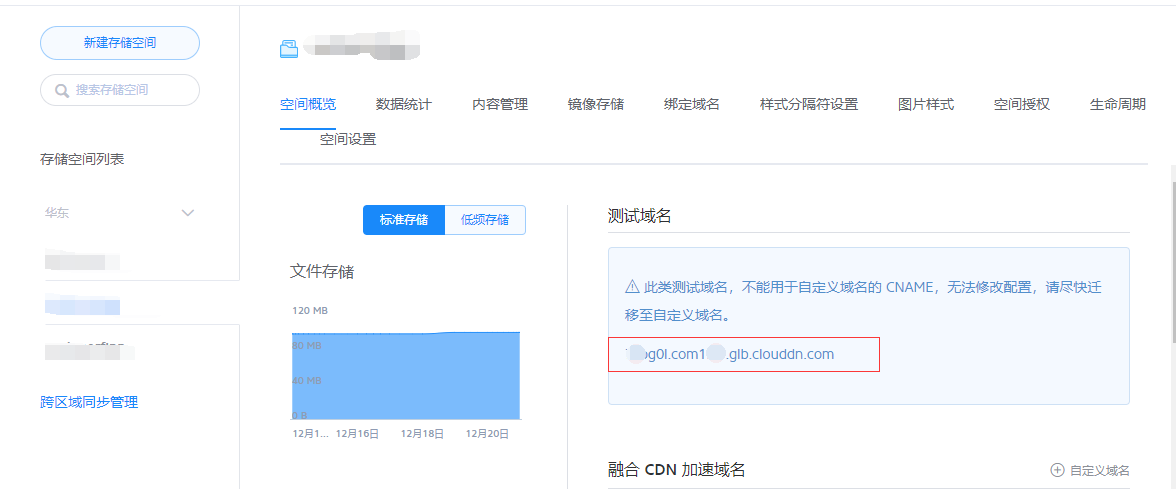
在配置文件里,存储空间需要
设定上传地址是指七牛云 自动分配给你的网址,或者 是你自己绑定的域名(注意要加http://或者https://):
网址后缀通常是你用到了七牛的图片处理工具的时候会用到的一些处理参数,比如图片瘦身。
# 阿里云
配置项及说明:
{
  "accessKeyId": "",
  "accessKeySecret": "",
  "bucket": "", // 存储空间名
  "area": "", // 存储区域代号
  "path": "", // 自定义存储路径
  "customUrl": "" // 自定义域名,注意要加http://或者https://
}
2
3
4
5
6
7
8
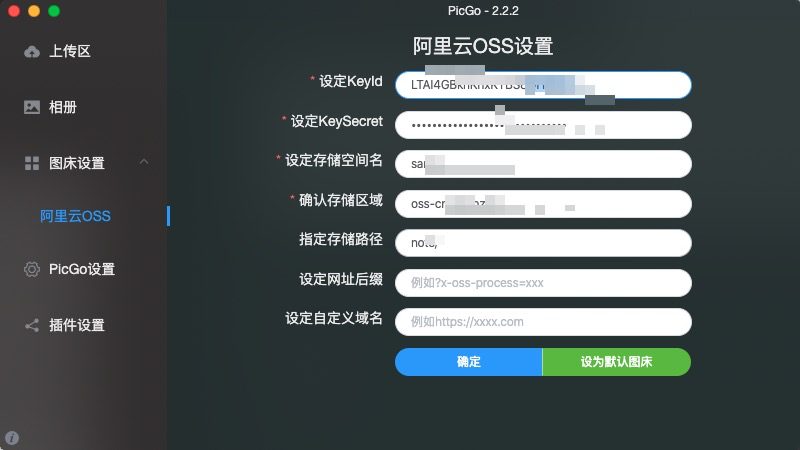
首先先在阿里云OSS的控制台 (opens new window)里找到你的accessKeyId和accessKeySecret: 
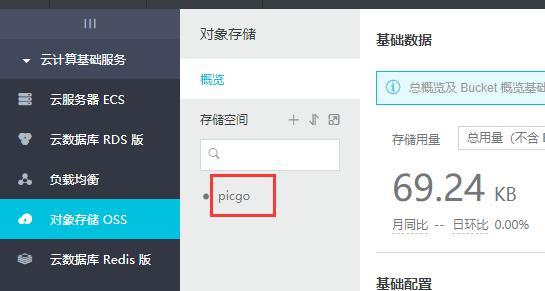
创建一个bucket后,存储空间名即为bucket:
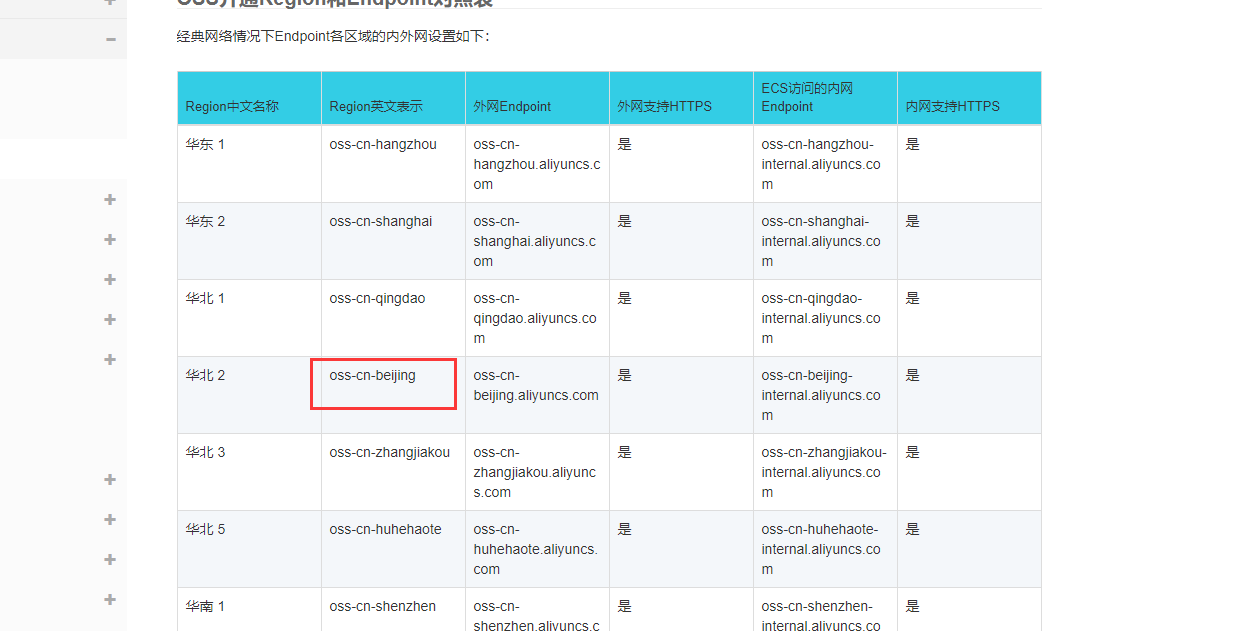
确认你的存储区域 (opens new window)的代码:
也可以在bucket页面找到:
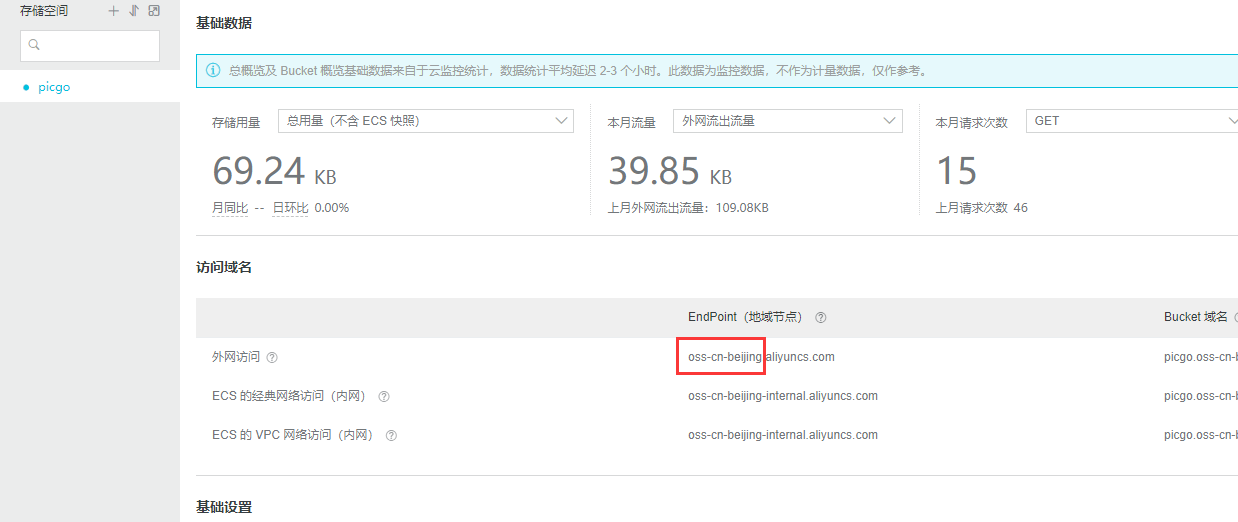 如上图,存储区域就是
oss-cn-beijing
存储路径比如img/的话,上传的图片会默认放在OSS的img文件夹下。注意存储路径一定要以/结尾!存储路径是可选的,如果不需要请留空。
# 相关链接
https://typora.io/#windows
https://picgo.github.io/PicGo-Doc/zh/guide/config.html#阿里云oss

