 Github常用自动化及发布设置
# Package 发包
- 对于需要发布的包,有几个前置知识是需要知道的。
- 对于dependencies,只要有用户下载你这个包,dependencies里面的包都会进行安装。
- 对于devDependencies,用户下载你这个包不会安装这些包。
- 对于peerDependencies,用户下载你这个包后如果用户没安装会进行报警,如果用户已有这个包但版本与你的不匹配会报警。用户下载你这个包不会自动安装peerDependencies。
# 1.前期配置
目前,这个包还不能用,因为没有编译输出,我们肯定不能用react-scripts来输出。需要自行制作编译N。
由于使用ts,所以我们需要做个tsconfig.build.json作为输出的配置文件。
{
    "compilerOptions": {
        "outDir": "dist",
        "target": "es5",
        "module": "esnext",
        "declaration": true,
        "jsx": "react",
        "moduleResolution": "node",
        "allowSyntheticDefaultImports": true,
        "skipLibCheck": true,
        "esModuleInterop": true,
        "strict": true,
        "forceConsistentCasingInFileNames": true,
        "resolveJsonModule": true
    },
    "include": ["src"],
    "exclude": ["src/**/*.stories.tsx", "src/**/*.test.tsx"]
}
1
2
3
4
5
6
7
8
9
10
11
12
13
14
15
16
17
18
2
3
4
5
6
7
8
9
10
11
12
13
14
15
16
17
18
修改script配置:
"build": "tsc -p tsconfig.build.json"
1
之后可以生成dist目录
将dist 添加进gitignore不写入。
package.json对发包目录进行配置:
"files": [
    "dist"
],
1
2
3
2
3
对私有进行修改:
"private": false,
1
github package目前只支持作用域包,所以我们需要先进行改名,改成作用域+包名。
githubPackage的包不会显示在npm页面上,虽然都是使用npm进行安装。所以很多开源项目一般不发github package。
# 2.修改 package.json
- name为 @用户名/原包名
- 把仓库上传到github,并把地址贴到
repository里,仓库的名字和包名是一样的 - registry为 https://npm.pkg.github.com/用户名
"name": "@samyzh/rat-ui",
"repository":"https://github.com/samyzh/rat-ui",
"publishConfig": {
    "registry": "https://npm.pkg.github.com/samyzh"
},
1
2
3
4
5
2
3
4
5
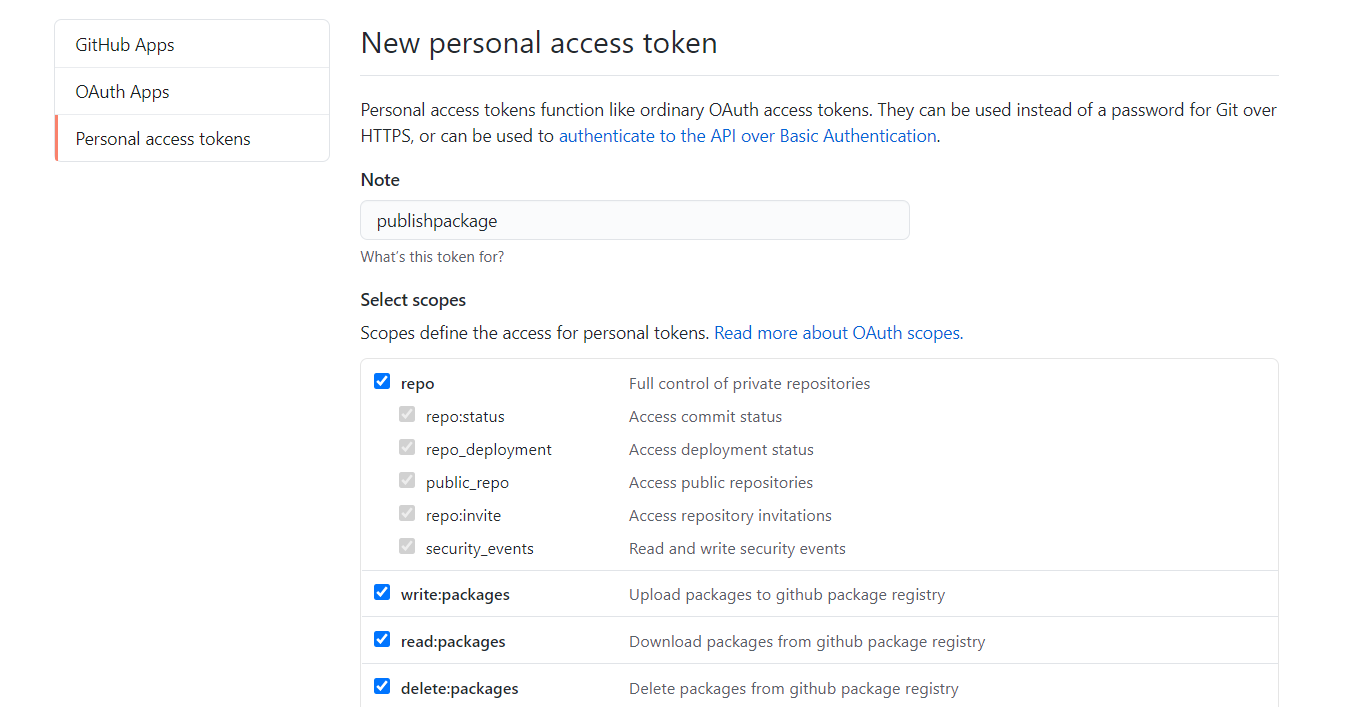
会让你输入密码,这个密码是githubtoken,注意,是githubtoken ,是githubtoken。重要的事说3遍,因为这个设计有点反人类,它是粘贴并且看不见粘贴上没有。**githubtoken在github的setting里面生成。**参考下面Action中获取token;
# 3.登录npm
npm login --registry=https://npm.pkg.github.com --scope=@samyzh
username 为你的github用户名
password 为刚才第一步生成的token
1
2
3
2
3
# 4. 发包
npm run build
npm publish
1
2
2
# 5.在github上搜索包名
# Actions 持续集成
# 1.生成token
- 1.登录github并访问 tokens (opens new window)页面
- 生成token并拷贝到剪贴板上
# 访问token页面

# 创建token,给权限
# 把token拷贝出来

# 2.修改命令
在package.json中增加修改build-storybook命令
  "scripts": {
    "start": "react-scripts start",
    "build": "tsc -p tsconfig.build.json",
    "test": "react-scripts test",
    "eject": "react-scripts eject",
    "storybook": "start-storybook -p 6006 -s public",
+    "build-storybook": "build-storybook --no-dll --quiet",
    "coverage": "react-scripts test --coverage --watchAll=false",
    "coverall": "npm run coverage  && cat ./coverage/lcov.info | ./node_modules/coveralls/bin/coveralls.js && rm -rf ./coverage"
  },
1
2
3
4
5
6
7
8
9
10
2
3
4
5
6
7
8
9
10
# 3.添加ACCESS_TOKEN
- 在secrets (opens new window)中添加一个Secret
- 名称为
ACCESS_TOKEN, 值为上面第一步生成的token

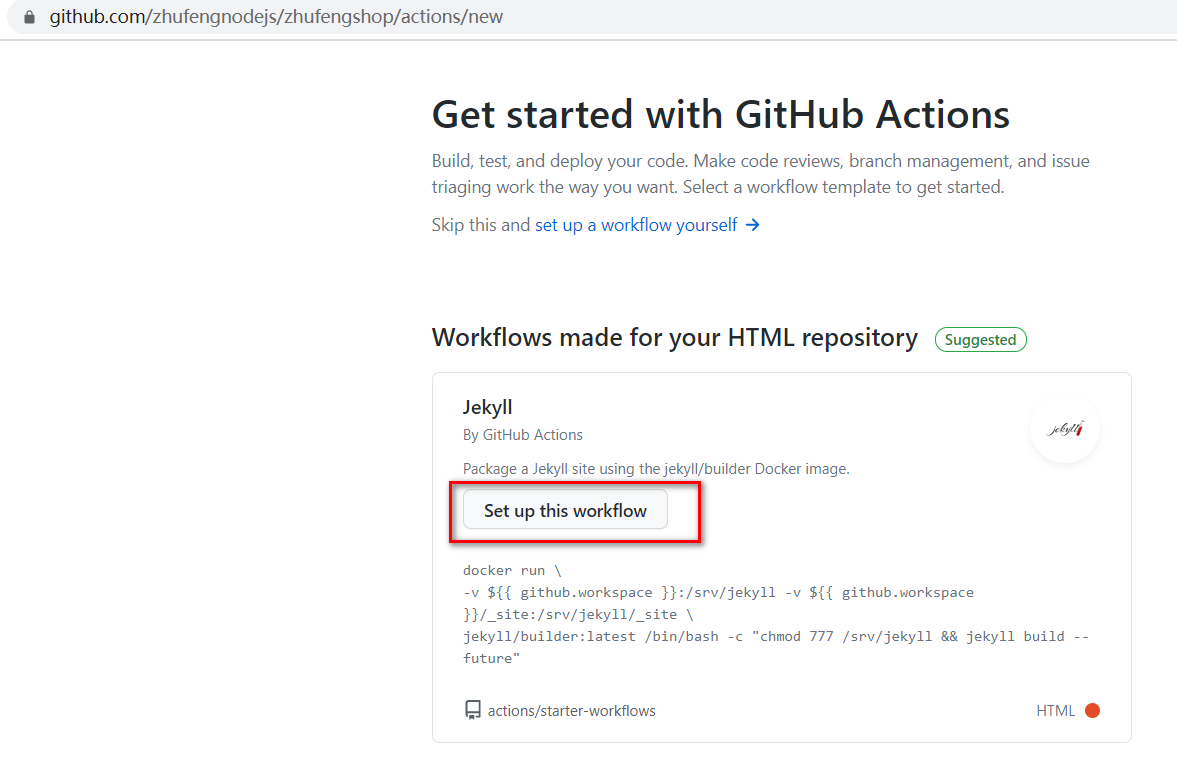
# 4.添加Actions
- 打开项目的[actions(https://github.com/zhufengnodejs/zhufengreactui/actions)页面
- 根据向导添加脚本,会自动写到
.github\workflows\blank.yml目录中
name: Build and Deploy
on: [push]
jobs:
  build-and-deploy:
    runs-on: ubuntu-latest
    steps:
      - name: Checkout 🛎️
        uses: actions/checkout@v2 # If you're using actions/checkout@v2 you must set persist-credentials to false in most cases for the deployment to work correctly.
        with:
          persist-credentials: false

      - name: Install and Build 🔧 # This example project is built using npm and outputs the result to the 'build' folder. Replace with the commands required to build your project, or remove this step entirely if your site is pre-built.
        run: |
          npm install
          npm run build-storybook

      - name: Deploy 🚀
        uses: JamesIves/github-pages-deploy-action@releases/v3
        with:
          GITHUB_TOKEN: ${{secrets.ACCESS_TOKEN}}
          BRANCH: gh-pages # The branch the action should deploy to.
          FOLDER: storybook-static # The folder the action should deploy.
1
2
3
4
5
6
7
8
9
10
11
12
13
14
15
16
17
18
19
20
21
22
2
3
4
5
6
7
8
9
10
11
12
13
14
15
16
17
18
19
20
21
22
# 5.拉取Action代码
- 在本地用
git pull把服务器端生成的blank.yml代码拉取本地
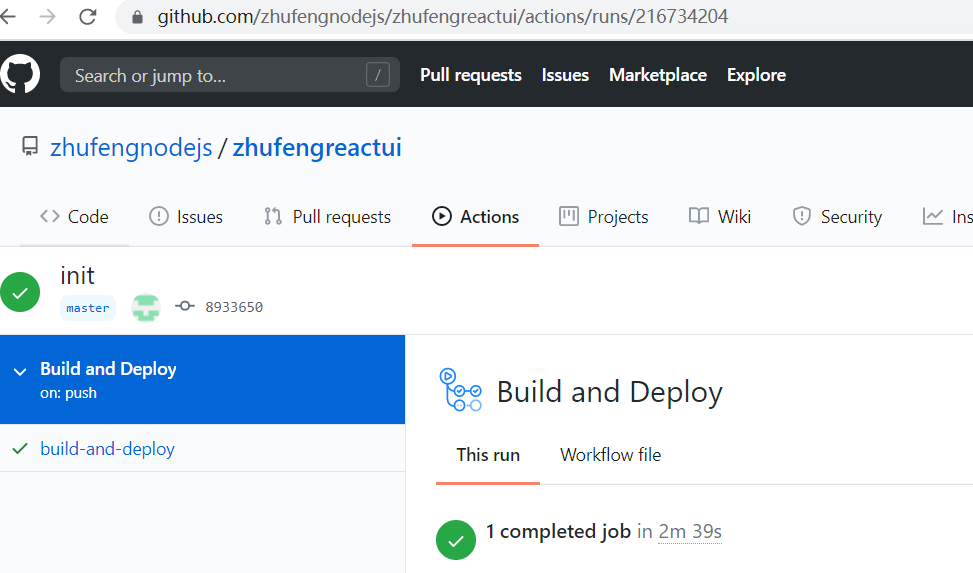
# 6.合并后推送
- 在这里 (opens new window)就可以看到构建任务了
# COVERALLS 代码覆盖率
前面我们已经可以通过npm run coverage生成代码覆盖率,这样还要敲个命令麻烦,可以通过coveralls来告诉我们。
# 1.coveralls注册
- 访问coveralls (opens new window)
- 注册并登录,同步后使用add repo添加已上传项目

点击detail到详情页拷贝出来token

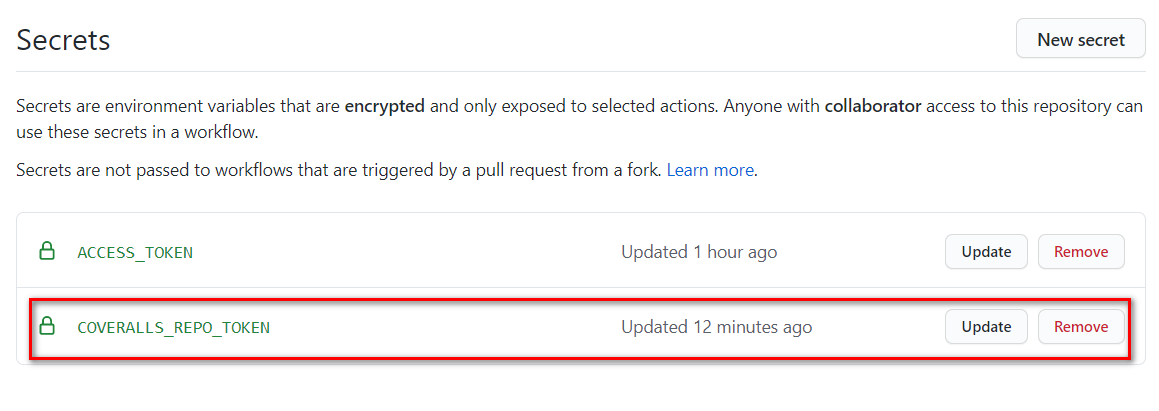
# 2.添加COVERALLS_REPO_TOKEN
- 切回github仓库 (opens new window)
- 在secrets (opens new window)中添加一个secret,名称为
COVERALLS_REPO_TOKEN,值为第1步拷贝出来的token
# 3.安装coveralls
yarn add coveralls
1
# 4.添加命令
  "scripts": {
    "start": "react-scripts start",
    "build": "tsc -p tsconfig.build.json",
    "test": "react-scripts test",
    "eject": "react-scripts eject",
    "storybook": "start-storybook -p 6006 -s public",
    "build-storybook": "build-storybook --no-dll --quiet",
    "coverage": "react-scripts test --coverage --watchAll=false",
+    "coverall": "npm run coverage  && cat ./coverage/lcov.info | ./node_modules/coveralls/bin/coveralls.js && rm -rf ./coverage"
  },
1
2
3
4
5
6
7
8
9
10
2
3
4
5
6
7
8
9
10
# 5.修改githubActions
.github\workflows\你的名字.yml
+  - name: Coveralls
+        env:
+          COVERALLS_SERVICE_NAME: 'GitHub CI'
+          COVERALLS_GIT_BRANCH: master
+          COVERALLS_REPO_TOKEN : ${{secrets.COVERALLS_REPO_TOKEN}}
+        run: |
+          npm run coverall
1
2
3
4
5
6
7
2
3
4
5
6
7
# 6.添加badges
- 把这一段拷贝到自己的
README.md里
# 7.提交并自动触发构建
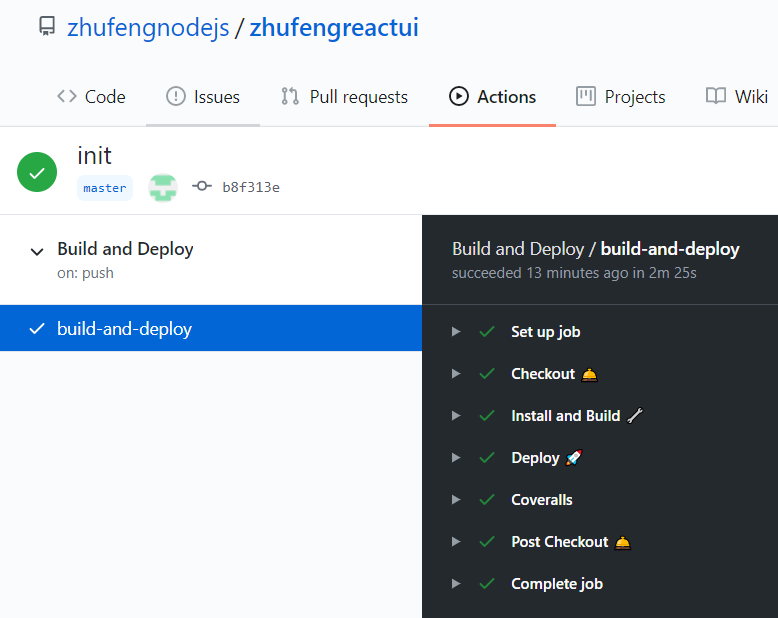
- 在README.md里就可以看到链接了,点击可以说覆盖率详情页 (opens new window)
- 把这一段拷贝到自己的
https://coveralls.io/github/zhufengnodejs/zhufengreactui?branch=master)
上次更新: 2022/04/15, 05:41:30
